Technology: SD-WAN
Manufacturer: Cisco
Software: IOS-XE Universal 17.5
Platform: vManage 20.6
In this material, you will see how router onboarding in Cisco SD-WAN is carried out. I will also show you how to load a configuration template into your router.
In our company’s demo set, we have simulated three new sites: Site1 on the left, which is our data center, Site 2 is the Office 2 office, and Site 3 is the Office 3 office. In DC and Site 2, we launched physical cEdge routers, while in Site 3 we have something new: Catalyst8000 (C8000v) in the virtual version.
SD-WAN Overlay is built between individual routers. Each router also has two Internet connections.
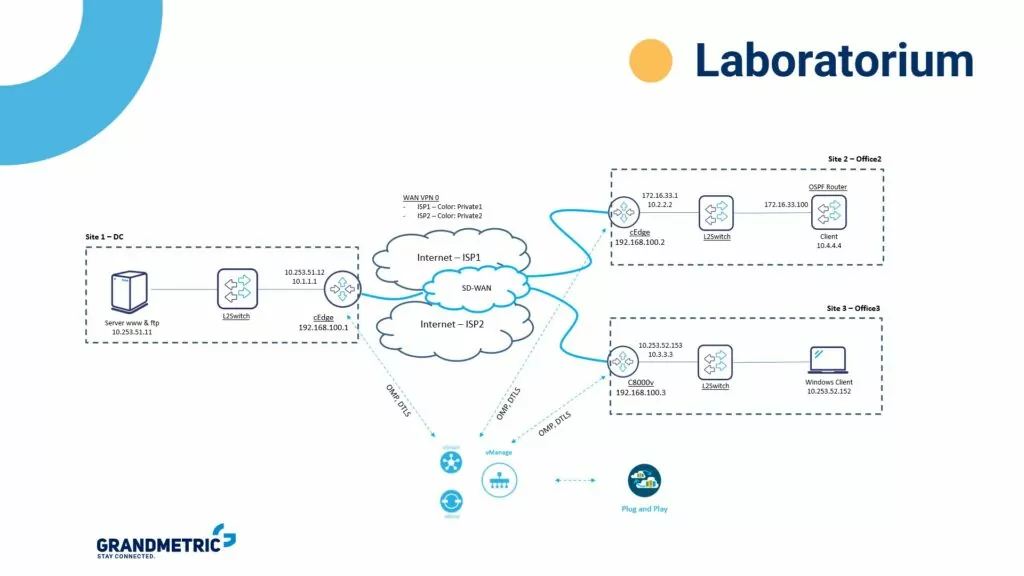
We have two vSmart, two vBond and one vManage controllers. How do we check that this is the case? The controllers are located in the cloud. The SD-WAN provisioning orchestrator allowed us to choose between AWS and Azure. We chose AWS.
ZTP process in SD-WAN
Zero Touch Provisioning configuration begins with logging in to the PnP Portal, which comprises the serial numbers of all our routers. PnP is connected to Smart Account, where DNA licenses appear.
We start the Zero Touch Provisioning process by taking the router out of the box and connecting it to a socket with Internet access 🙂
Then comes the moment when the router joins vBond, authenticates with a certificate, in response to which vBond provides it with information about vManage and vSmart. On the other hand, vBond informs vManage and controllers that there is a new router in Overlay.
Router onboarding in vManage
How to make the router connect and appear online on vManage? You need to configure a basic Device Template.
- Launch the PnP portal (Plug and Play Connect). Our portal already shows two C8000V routers, two cEdge C1121X routers and one cEdge C1111 router.
- Go to vManage. We see that we are missing the C1121X router.
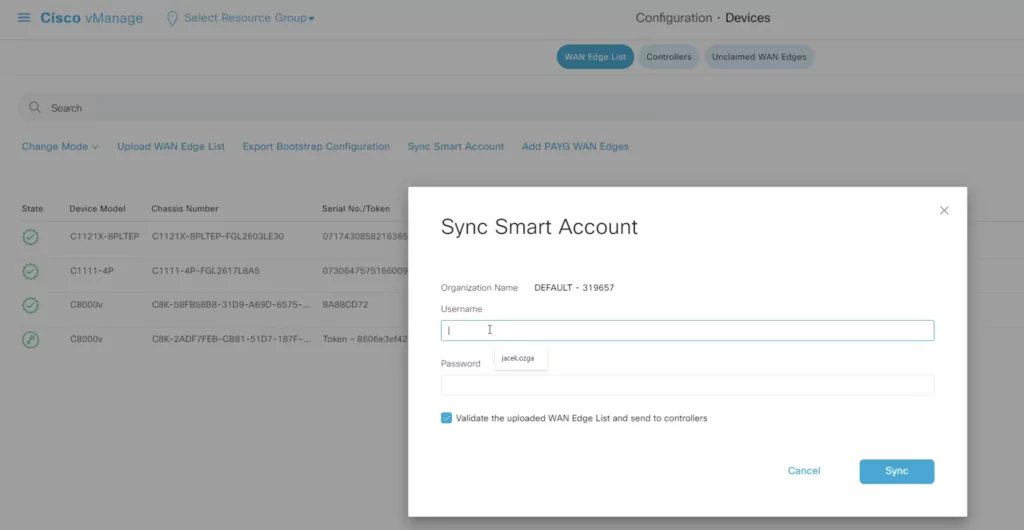
- Launch Sync Smart Account by logging in with your details. Once logged in, vManage tries to connect to the PnP portal to retrieve the latest lists. The missing router should appear in vManage. You will find it by selecting Configuration from the side menu.
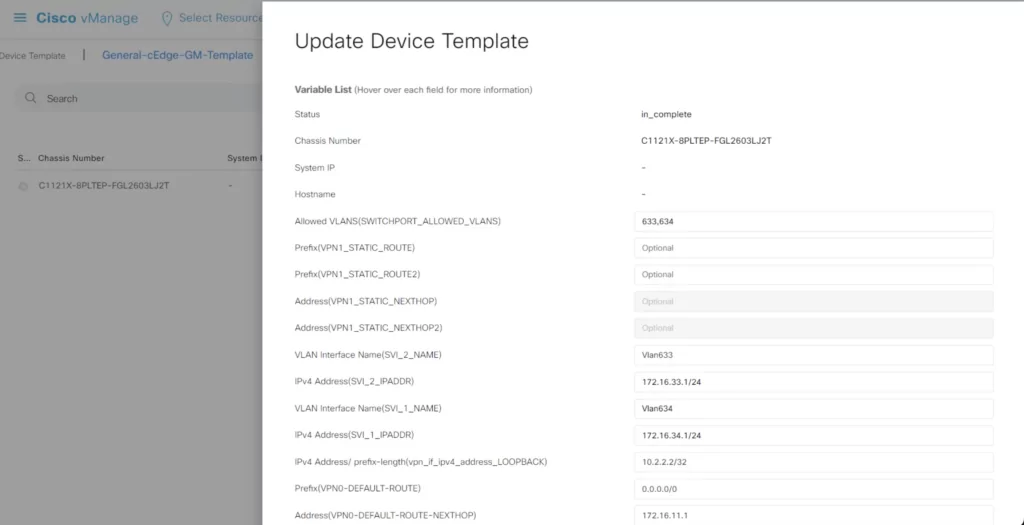
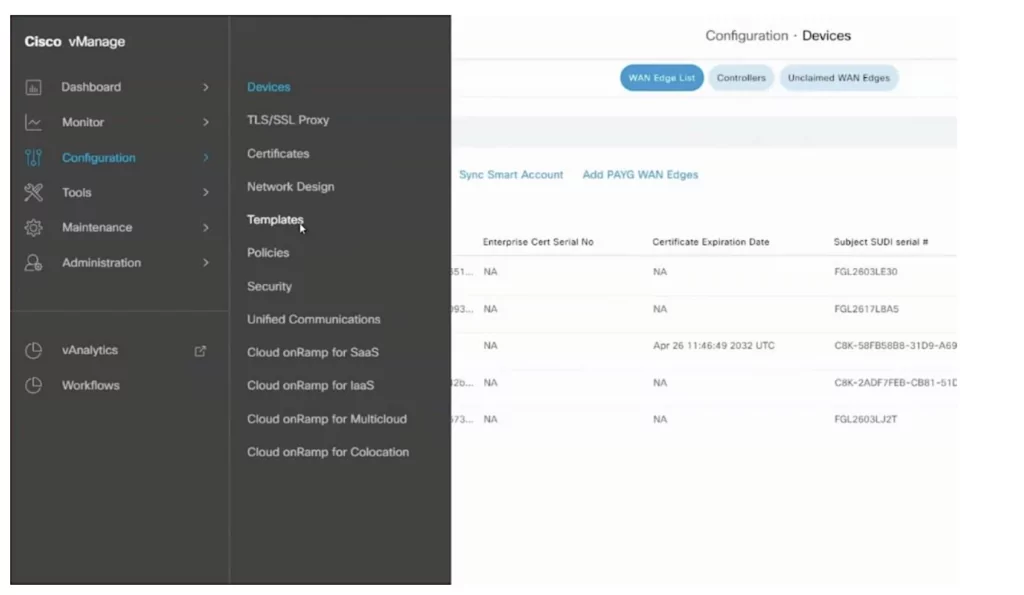
- Plug the Device Template into your router to connect it to the network. To do this, select Configuration Templates from the side menu, and then from the list of templates, select the one appropriate for the router you are configuring (in our case, C1121X).
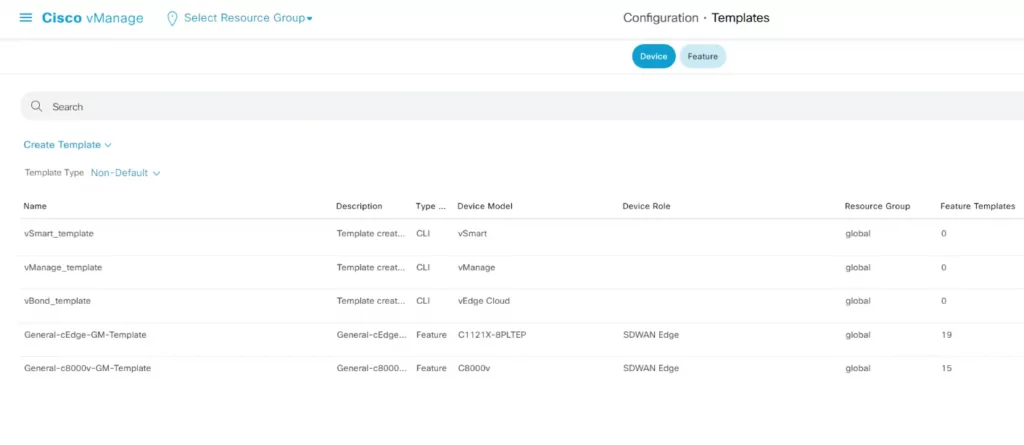
- Load the template to your device by appropriately modifying the interface addressing (for example, we use VLAN 633, 634)
- Allowed VLANS (SWITCHPORT_ALLOWED_VLANS) specifying the numbers of allowed VLANs: 633,634
- VLAN Interface Name (SVI_2_NAME): Vlan633
- IPv4 Address (SVI_2_IPADDR) of allowed VLANs – the naming convention is the one you know from IOS, e.g. 172.16.33.1/24
- VLAN Interface Name (SVI_1_NAME): Vlan634
- IPv4 Address (SVI_1_IPADDR) dopuszczonych VLANów – the naming convention is the one you know from IOS, e.g. 172.16.34.1/24
- Loopback (here 10.2.2.2/32)
- Default route – define the next hop
- Default route – define the next hop
- Validate routing configuration
- Select your router from the list -> Config Preview to see how the configuration looks.
- If you make changes to it, you will see them in the Config Diff tab. In green, you will see the commands sent to the router, and in red those removed from the configuration.
- Send the configuration to the router. By default, the configuration status is Scheduled. You can expand its individual steps by clicking the plus sign next to the status name. The configuration will be sent from vManage to the router when it logs in to the network.
- By default, a newly logged in router has the default name Router. You will recognize that it has downloaded a configuration when its name appears in the vManage dashboard. Please note that after downloading the configuration, the router will restart and you will have to wait several seconds for it to reappear in the dashboard.
Do you want to configure SD-WAN using templates professionally? Take advantage of the practical Software-defined WAN Training – Build and Maintain training, where we show you how to configure SD-WAN from Cisco step-by-step.
How to verify the operation of the router after passing ZTP?
-
- Select Monitor -> Network from the side menu
- Select the router you just added.
- Check its parameters, paying particular attention to vSmart Control Connections. In this panel you will see what routers your device is connected to.
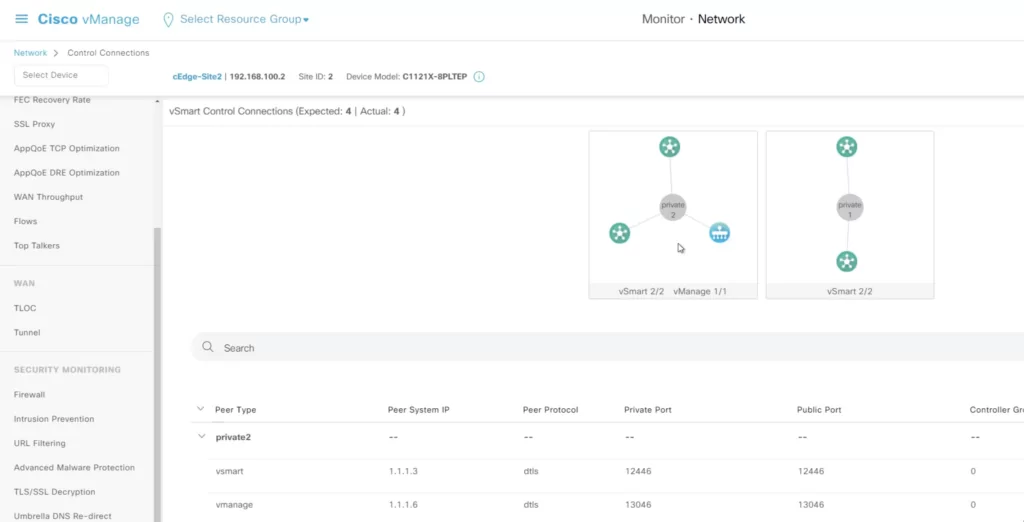
In our example, you can see our grey router is connected to two vSmart routers and one vManage router via two Internet links, private1 and private2. The name of the links is important because in further steps we can establish policies based on it.
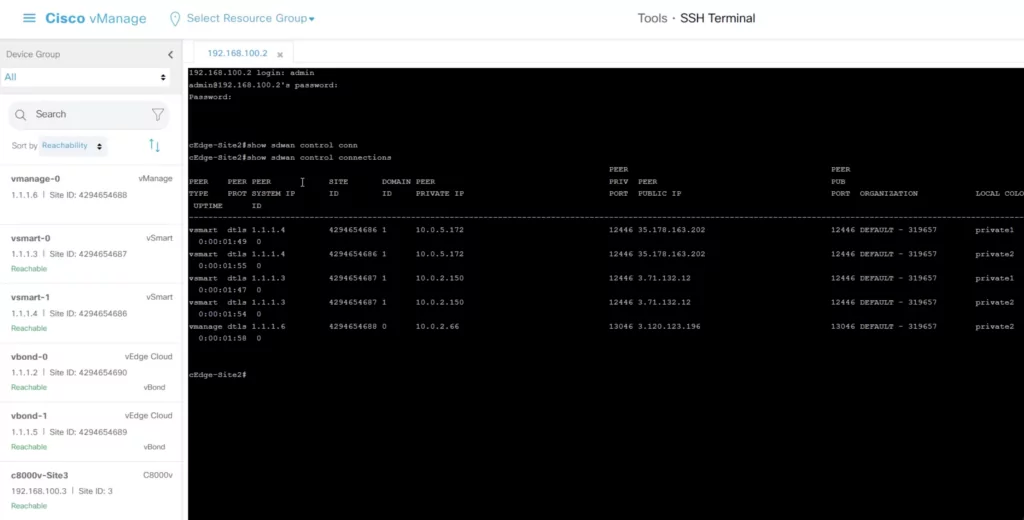
You can get the same information by connecting to the router via SSH and using the command
show swan control connections
BEWARE! If you already have a router in vManage, you lose the ability to update the configuration from the CLI. All configuration changes are only possible via vManage.
Stay up to date on the topics you work with every day
Sign up for the Grandmetric Tech Newsletter. Get access to premium materials: e-books, checklists, webinars and more.
Author: Jacek Ozga
